Showing posts with label Cisco Router Configurations. Show all posts
Configuring Password on Cisco Routers
Hello Friends it may be possible in many cases that you want your cisco router to be configured with a password so that no outsider can make access to your cisco router in this post i'm going to describe the procedure of configuring password on a cisco router
Types of Passwords on Cisco Routers
- 1. Line Passwords
- 2. Privileged mode Passwords (enable mode )
- 3. Username Passwords ( Optional )
First we will understand these Passwords that where do they work.
1. Line Passwords
Console Line - The console is the main serial administrative port on a router. This is where you configure the router when it is new and has no network configuration.
Aux Line – The aux line is an auxiliary port. Like the console, it is a physical port on every router. You can think of it as a backup console port. Besides being a backup console port, the aux port is periodically used for administrative console dial up access to the router.
VTY Lines – Vty lines are “virtual tty” lines and are used when you connect to the router via telnet or ssh. These are not physical lines on the router but virtual “inbound network lines”.
Async Lines – Async lines are asynchronous serial lines and are optional. These async lines are created when you insert an async serial card in a router. You can use the async serial lines to connect dumb-terminals (text-based terminals), serial printers, or modems.
All of these different lines need a password configured on them. Let’s find out how to configure Cisco router line passwords.
Configuring Cisco Routers with Passwords
Enable Password
Enable Password
To configure enable password on cisco router turn on your cisco router and go through the following commands :
Maati>enable
Maati#configure terminal
Maati(config)#enable password your password
Maati(config)#exit
Screenshot of My router CLI :

we can see the enable password configured on a cisco router by using the #show run command if you want your enable password to be encrypted you should use the folloing steps insted
Maati>enable
Maati#configure terminal
Maati(config)#enable secret your password
Maati(config)exit
Screenshot of My Router CLI :

Console Password
now we will learn how to configure the console password , for console password we will use two commands one for setting password and second to enable console password at the time of login through console. Here is the set of commands you need to follow to set console password.
Maati>enable
Maati#configure terminal
Maati(config)#line console 0
Maati(config-line)password your password
Maati(config-line)login
Maati(config-line )exit
Screenshot Of My Router CLI :

Telnet Password
In case you are not at your office and hence no console access to your Cisco router then you can access your router remotly, and you must set a telnet password on your cisco router so that no one else can access your cisco router remotly.
Following is the set of commands used to set telnet Password on Cisco Routers.
Maati>enable
Maati#configure terminal
Maati(config)#line vty 0 15
Maati(config-line)password your password
Maati(config-line)login
Maati(config-line)exit
Screenshot My cisco Router CLI :
Configure Cisco Router as Frame Relay Switch
Cisco Router as a Frame Relay Switch
The following are the steps with topology diagram explaining the step by step configuration :
In this example we will take four routers R1, R2, R3 and R4 . The Router R2 will be working as the Frame relay Switch. Now open the GNS3 Simulator and create the following topology with the help of four Routers.

Remember to create topology using only serial cables because Frame-Relay is a Wan technology and works only on Wan links.Now open the console of Router R2 and start configuring it for Frame-Relay with the commands given below.
R2>enable
R2#configure terminal
R2(config)#frame-relay switching
R2(config)#interface s0/0
R2(config-if)#no shutdown
R2(config-if)#no ip address
R2(config-if)#clock rate 56000
R2(config-if)#encapsulation frame-relay
R2(config-if)#frame-relay intf-type dce
R2(config-if)#frame-relay route 103 interface s0/1 301
R2(config-if)#frame-relay route 104 interface s0/2 401
R2(config-if)#interface s0/1
R2(config-if)#no shutdown
R2(config-if)#no ip address
R2(config-if)#clock rate 56000
R2(config-if)#encapsulation frame-relay
R2(config-if)#frame-relay intf-type dce
R2(config-if)#frame-relay route 301 interface s0/0 103
R2(config-if)#interface s0/2
R2(config-if)#no shutdown
R2(config-if)#no ip address
R2(config-if)#clock rate 56000
R2(config-if)#encapsulation frame-relay
R2(config-if)#frame-relay intf-type dce
R2(config-if)#frame-relay route 401 interface s0/0 104
R2(config-if)#exit
To confirm your FRS is working properly you can use the following command :
R2#show frame-relay route

Basic Troubleshoot Cisco IOS
Cisco IOS Support a Number of Commands that can be used to monitor and troubleshoot problems related to configuration andhardware diagonosis.Those who has good experience with cisco ios knows how to deal with problems and which commands would help recover and troubleshoot the problems. This post targets the audience which include engineers with less experience and trying to become more familiar with the tools available for tshoot.
Show Processes CPU
Show Processes CPU
One of the most basic commands to run on a Cisco device is show processes cpu. In its full view the command will show all of the active processes on a device and how much of the processor time the process is taking both currently and historically. Figure 1 below shows a shortened version of the command:

This command would typically be used when troubleshooting a problem with a device that is having trouble performing basic functions; for example if a router is having trouble forwarding and routing packets without loss.
Show Memory
Another command that is commonly in conjunction with the show processes cpu is the show memory command. This command is used to display the current status used and available memory; as with the show processes cpu command the show memory command also displays much more specific information about how memory is being allocated, however the initial information is often enough to get an idea of whether the problem happening is memory related. Figure 2 below shows a shortened version of the command:

Show ip interface brief
One of the most commonly used commands overall is the show ip interfaces brief command. As shown in Figure , this command is very helpful as it displays the interface, its associated IP address and its current status.

Show ip route
The show ip route command is another often used command on Cisco IOS devices; it is used to display the contents of the current IP (IPv4) routing table. Obviously, when working on a Cisco router the contents of the routing table are a central part of the device operations, if information within the routing table is incorrect it can quickly lead an engineer in a direction to solve a problem. Figure below shows the command:

Ping
Another very common tool is the ping command, obviously this is a command/tool that is not limited to Cisco IOS but can be used for a variety of different troubleshooting situations on Cisco devices. At its most simple, the ping command is used to send 5 100-byte ICMP echo packets to a specific destination; but the Cisco IOS extended ping command can do a number of different things that allow allot of troubleshooting flexibility. Some of these abilities include altering the ICMP source interface, packet size, packets sent, pattern sent, do not fragment bit, among others. Figure shows an example of an extended ping:

Traceroute
On the same track as the ping command above the traceroute command is a very basic command that can be very versatile and used in a number of different troubleshooting scenarios. At its most basic the traceroute command is used to trace the route that a packet takes from a source to destination, included with this information is an output of response times between the source and each intermediate device. One often unknown piece of information is that the traceroute command does not work exactly like the tracert command that is used on Microsoft devices; Cisco’s traceroute command uses UDP to trace the route from source to destination, often this is done with other implementations using an ICMP packet. This can be an advantage in many ways because many networks automatically drop ICMP echo packets because they are commonly used in Denial of Service (DoS) attacks. Like the ping command the traceroute command can be configured with a number of different extended parameters including source interface, timeout, number of probes per device hop and UDP port number among others. Figure below shows an example of the traceroute command:

For any query Please Comment Below With Your E-mail ID.
How To configure DHCP Server On a Cisco Router

Hey Friends Today i'm going to Tell You how we can configure a cisco Router as a DHCP Server .
Using a DHCP Server we can Dynamically Provide the following things to a device on our network:
ip address
subnet mask
default-route
DNS server address
In this example we will consider that we have a network range of 10.0.0.0 to 10.255.255.255 for
which we are going to configure the DHCP Server and the DNS Server address would be 4.2.2.2
the default route for each device on the network would be 10.0.0.1
We will exclude the network Range of 10.0.0.0 - 10.0.0.10 so that we can use these addresses later manually
Turn On Your Cisco Router and Type down the following commands :
Router>enable
Router#configure terminal
Router(config)#ip dhcp excluded-address 10.0.0.1 10.0.0.10
Router(config)#ip dhcp pool Maati
Router(dhcp-config)#network 10.0.0.0 255.0.0.0
Router(dhcp-config)#default-router 10.0.0.1
Router(dhcp-config)#dns-server 4.2.2.2


Tag :
CCNP,
Cisco Router Configurations
Basic Router Configurations
Basic Router Configuration
In this post we will discuss how to configure a cisco router with some basic configurations. Following are the terms being described in this post :
· Hostname
· Banner Message of the day
· Bringing up an interface
· Discribing the purpose of interface
· Disabling DNS lookup
· Clock Rate on Serials
· IP addressing
· Viewing, saving and erasing configurations
Hostname
The identity of any Router can be set with the host name command. It is only locally significant.
Example :
Router>enable
Router#configure terminal
Router(config)#hostname Maati
Maati(config)#exit

Banners
Banners is the information being displayed when someone tries to access the console or virtual terminal lines of your router to logon to your router. You can use the Banners to display the security warnings or some message at the login time.
Example:
Router>enable
Router#configure terminal
Router(config)#banner motd x maati’s router x
Router(config)#exit
Here x is the delimeter character you can use any character as delimeter character.


Bring up an interface
On cisco routers all interfaces by default are in shut down mode means administratively down
You can check the status of these interfaces by using the command show ip interface brief at the user privellige mode on cisco routers. To bring up the status of an interface we use the no shutdown command.
Example:
Router>enable
Router#configure terminal
Router(config)#interface serial0/0
Router(config-if)#no shutdown
Router(config-if)#exit
Router(config)#interface fastethernet0/0
Router(config-if)#no shutdown
Router(config-if)#exit

Disabling DNS lookup
DNS lookup can sometime take your time looking for the name translations even if you didn’t configure any host name but we can disable the DNS lookup from your cisco device.
Example:
Router>enable
Router#configure terminal
Router(config)#no ip domain-lookup
Router(config)#exit

Clock rate on serial interfaces
Serial interfaces need to be configured with the clock rate and following example describe the commands used to set the clock rate on serial interfaces.
Example:
Router>enable
Router#configure terminal
Router(config)#interface serial0/0
Router(config-if)#no shutdown
Router(config-if)#clock rate 4800
Router(config-if)#exit
The clock rate can be set from some specific values.

IP addressing
Every interface need to be configured with an IP address on the router to communicate over the network. Consider an example in which we will assign the ip address 192.168.10.1 with subnet mask 255.255.255.0 on fastethernet interface of router and ip address 192.168.20.1 with subnet mask 255.255.255.0 on the serial interface of router.
Router>enable
Router#configer terminal
Router(config)#interface fastethernet0/0
Router(config-if)#ip address 192.168.10.1 255.255.255.0
Router(config-if)#no shutdown
Router(config-if)#exit
Router(config)interface serial0/0
Router(config-if)#ip add 192.168.20.1 255.255.255.0
Router(config-if)#no shutdown
Router (config-if)exit

Viewing, saving and erasing configurations
After you are done with your router’s configurations you can view save and erase the configurations of your router.
Example:
Viewing
Router>enable
Router#show running-config

Saving
Router>enable
Router#copy running-config starup-config
Or
Router#write

Erasing startup configurations
Router>enable
Router#erase startup-config

Configuring EIGRP on cisco Routers
Hello guys in this post we will learn how to configure Eigrp Routing Protocol on the Cisco Routers
First we should know the features that Eigrp Support .
Features of Eigrp Routing protocol :
- Automatic redistribution of routes between IGRP and EIGRP.
- Ability to turn off and on EIGRP and IGRP on individual interfaces of the router.
- Fast network convergence thanks to EIGRP's DUAL algorithm (convergence is when all routers know about all the networks that every other router is offering).
- Incremental Updates that save network bandwidth and speed convergence.
- Reduced router CPU load, as compared to IGRP.
- EIGRP uses neighbor discovery to find and keep track of neighboring routers. Neighbor discovery uses multicast IP and is not tied to whether or not the the IP network is properly configured.
- EIGRP prevents routing loops on the network
- Supports variable length subnet masks (VLSM)
- Automatic Route Summarization
Router(config)#router eigrp 100 | Turns on the EIGRP process 100 is the autonomous system (AS) number, which can be a number between 1 and 65535 All routers in the same AS must use the same AS number |
Router(config-router)#network 10.0.0.0 | Specifies which network to advertise in EIGRP |
Router(config-router)#eigrp log-neighbor-changes | Logs any changes to an EIGRP neighbor adjacency |
Router(config-router)#no network 10.0.0.0 | Removes the network from the EIGRP process |
Router(config)#no eigrp 100 | Disables routing process 100 |
Router(config-if)#bandwidth x | Sets the bandwidth of this interface to x kilobits to allow EIGRP to make a better routing decision |
Auto summarization in Eigrp | |
Router(config-router)#no auto-summary | Turns off the auto-summarization feature. Networks are summarized at the classful boundary by default |
Router(config)#int fa 0/0 | |
Router(config-if)ip summary-address eigrp 100 10.10.0.0 255.255.0.0 | Enables manual summarization on this specific interface for the given address and mask |
Verifying Eigrp | |
Router#show ip eigrp neighbors | Displays a neighbor table |
Router#show ip eigrp neighbors detail | Displays a detailed neighbor table |
Router#show ip eigrp interfaces | Displays information for each interface |
Router#show ip eigrp int s 0/0 | Displays information for a specific interface |
Router#show ip eigrp int 100 | Displays information for interfaces running process 100 |
Router#show ip eigrp topology | Displays the topology table. This command will show you where your feasible successors are |
Router#show ip eigrp traffic | Displays the number and type of packets sent and received |
Troubleshooting Eigrp | |
Router#debug eigrp fsm | Displays events/actions related to the DUAL FSM |
Router#debug eigrp packet Router#debug eigrp neighbor | Displays events/actions related to EIGRP packets Displays events/actions related to EIGRP neighbors |
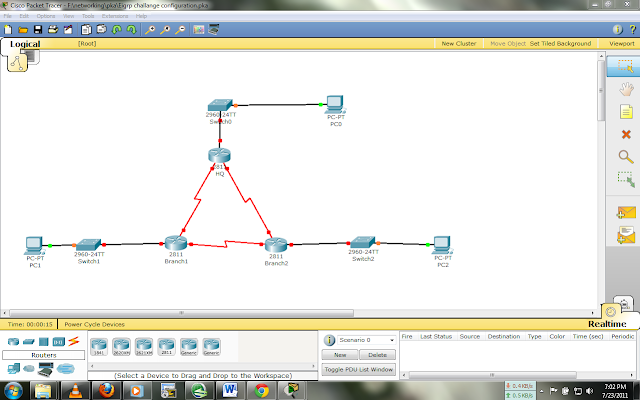
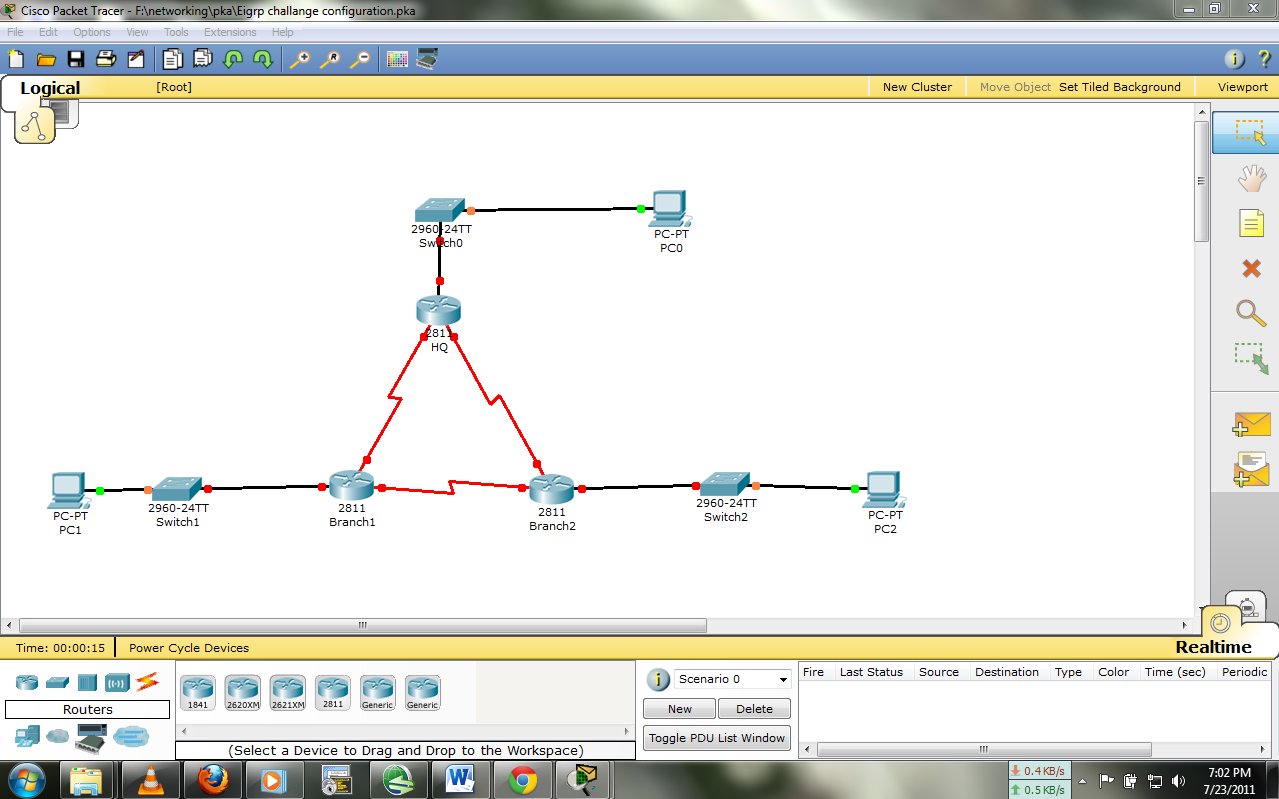
Download Eigrp Configuration Activity for Practice :